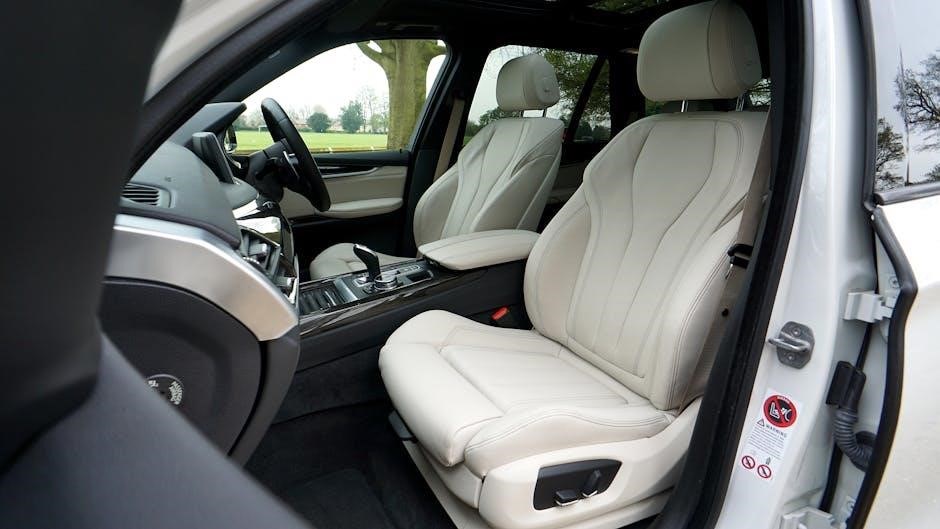
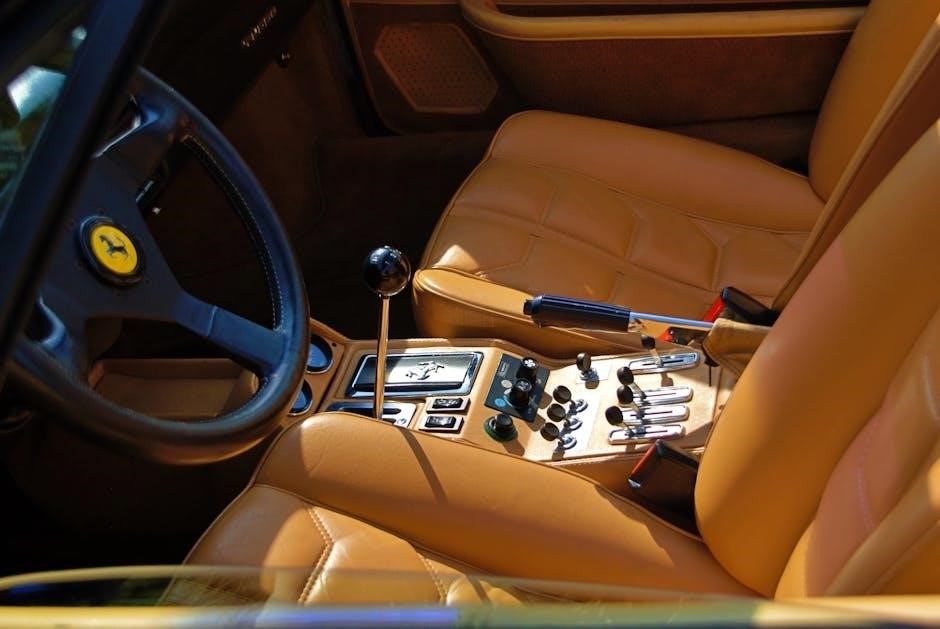
Upgrading to electric seats enhances comfort and convenience, offering improved adjustability and ease of use via power window-style switches. These conversions frequently boost legroom.
Benefits of Electric Seats
Electric seats deliver superior adjustability, catering to diverse driver preferences for optimal comfort and support. Conversion eliminates strenuous manual adjustments, offering effortless positioning with convenient controls. Many kits increase legroom, enhancing long-drive comfort. This upgrade provides a luxurious feel and improved driving experience, boosting vehicle value.
Overview of the Conversion Process
The conversion involves removing the manual seat mechanism, installing electric motors and mounting brackets, and meticulously wiring a new harness and control switch. A transformer might be needed. Thorough planning, compatible kit selection, and careful execution are crucial for a successful upgrade to powered seats.
Assessing Compatibility and Planning
Careful research of vehicle specifics and compatible kits is vital. Creating a detailed, step-by-step timeline minimizes complications during the conversion process.
Vehicle Make and Model Considerations
Determining compatibility begins with your vehicle’s make and model; not all kits universally fit. Some are vehicle-specific, ensuring a seamless installation. Thoroughly investigate if a kit supports your car’s existing electrical system and seat frame. Incorrect fitment can lead to functionality issues or safety concerns, so precise matching is crucial.
Researching Compatible Electric Seat Kits
Explore available electric seat kits, comparing components like motors, harnesses, and switches. Prioritize kits designed for your vehicle or universal options with adaptable mounting brackets. Read reviews and verify the kit includes all necessary hardware for a complete conversion, ensuring a smooth installation process.
Creating a Step-by-Step Timeline
Develop a detailed timeline, allocating time for disassembly, wiring, and installation. Factor in potential delays for troubleshooting or sourcing additional parts. Prioritize tasks logically – disconnect manual mechanisms first, then install electric components, and finally, test functionality. A clear plan minimizes complications.

Essential Tools and Materials
Necessary tools include sockets, wrenches, screwdrivers, a crimping tool, and a multimeter. Wiring diagrams and mounting hardware are crucial for a successful conversion.
Required Hand Tools (Sockets, Wrenches, Screwdrivers)
A comprehensive hand tool collection is vital for this project. You’ll need a 17mm socket, 16mm open-ended wrench, and an assortment of 8 and 10mm sockets. Philips and flathead screwdrivers are also essential, alongside various Torx bits/sockets for specific fasteners encountered during disassembly and reassembly.
Electrical Tools (Crimping Tool, Multimeter)
Essential electrical tools include a reliable crimping tool for secure wire connections and a multimeter for testing voltage and continuity. These tools ensure proper wiring and troubleshooting of the electric seat system. Accurate readings are crucial for safe and functional installation.
Wiring Diagrams and Mounting Hardware
Detailed wiring diagrams are vital for correctly connecting the electric seat components, ensuring proper functionality and preventing shorts. Comprehensive mounting hardware, often included in kits, secures the motors and brackets. Accurate diagrams and robust hardware are key to a successful conversion.
Understanding Power Seat Conversion Kits
Power seat conversion kits contain drive motors, wiring harnesses, control switches, and mounting brackets for seamless electronic seat adjustment and improved comfort.
Components of a Typical Kit (Motors, Harnesses, Switches)
Typical kits include powerful drive motors responsible for seat movement, integrated wiring harnesses simplifying electrical connections, and user-friendly control switches—often resembling power window controls. Mounting brackets ensure secure attachment, while necessary hardware facilitates a complete and functional conversion.
Kit Options: Universal vs. Vehicle-Specific
Universal kits offer broader compatibility but may require more customization, while vehicle-specific kits are designed for a precise fit within particular makes and models. Vehicle-specific options generally streamline installation, reducing the need for modifications and ensuring optimal functionality.
Disconnecting the Manual Seat Mechanism
Removal involves detaching existing seat tracks, cables, and rods. Careful disconnection is crucial for a smooth transition to the electric seat components.
Removing the Existing Seat Tracks
Begin by carefully unbolting the manual seat tracks from the vehicle’s floorboard, typically using a 17mm socket. Support the seat during removal to prevent accidental drops. Disconnect any wiring connected to the seat, noting their positions for reinstallation later.
Disconnecting Cables and Rods
Carefully detach the cables and rods connected to the manual seat mechanism, which control recline and forward/backward movement. Note their routing for reassembly if needed. These components will no longer be required with the electric seat installation, freeing up space.
Installing the Electric Seat Components
Mount the electric seat motor and securely attach the provided mounting brackets to the seat frame, ensuring proper alignment and stability for operation.
Mounting the Electric Seat Motor
Carefully position the electric seat motor onto the seat frame, aligning it with the designated mounting points. Utilize the supplied hardware – often bolts and brackets – to firmly secure the motor.
Ensure a snug fit, preventing any movement during operation. Double-check all connections before proceeding, as a loose motor can cause functional issues and potential damage.
Attaching Mounting Brackets
Securely fasten the provided mounting brackets to both the electric seat motor and the vehicle’s seat frame. These brackets are crucial for stable support and proper alignment.
Utilize appropriate bolts and washers, tightening them to the manufacturer’s specified torque. Confirm bracket stability before continuing, ensuring a robust foundation for the conversion.
Wiring the Electric Seat
Connect the wiring harness, considering a 12V/30amp power source and fuse. A transformer may be needed; ensure proper connections for functionality.
Connecting the Wiring Harness
Carefully attach the provided wiring harness to the electric seat motor and control switch, ensuring secure connections. Match wire colors and utilize crimping tools for reliable joins. Double-check all connections against the wiring diagram to prevent shorts or malfunctions, guaranteeing proper seat operation.
Power Source and Fuse Considerations (12V/30amp)
Utilize a 12V power source with a 30amp fuse to safely power the electric seat. If a transformer is used, consider an additional fuse after it, potentially mirroring the 30amp rating. Proper fusing protects the system from overcurrent and potential electrical damage.
Transformer Installation (if applicable)
When a transformer is needed, ensure it’s a 12V, 30amp model, compatible with your vehicle’s electrical system. Connect the transformer to a dedicated power source, and securely mount it to prevent vibration. Verify proper grounding for safety and optimal performance.

Installing the Control Switch
Choose a convenient location for the switch, then wire it directly to the harness, ensuring secure connections. Proper placement maximizes accessibility and usability.
Switch Placement Options
Consider integrating the new control switch into existing panels, like those used for windows or door locks, for a factory-like appearance. Alternatively, mount it on the seat’s side or center console. Prioritize easy reach and avoid obstructing other controls. Ensure the location doesn’t interfere with seat movement.
Wiring the Switch to the Harness
Carefully connect the switch wires to the corresponding wires within the electric seat harness, typically following a color-coded system. Use a crimping tool for secure connections. Double-check polarity before connecting to power, ensuring correct up/down and forward/backward functions.
Testing and Troubleshooting
Perform an initial functionality test of all seat adjustments. Address common issues like unresponsive motors or incorrect wiring with careful inspection and reconnection.
Initial Functionality Test
After wiring is complete, thoroughly test each electric seat function – forward/backward, height, recline, and lumbar support, if equipped. Verify switch responsiveness and smooth motor operation. Listen for unusual noises. Confirm all movements are within safe ranges, and address any immediate issues before final installation.
Common Issues and Solutions
Troubleshooting may involve checking wiring connections, fuses, and the power supply. A non-responsive motor could indicate a faulty motor or wiring issue. Binding or uneven movement suggests mounting bracket misalignment. Always double-check polarity and ensure proper grounding for optimal performance.
Recliner Conversion (Manual to Power)
Yes, manual recliners can be converted with a kit, including motors and controls. Installation typically requires basic tools for a powered reclining experience.
Utilizing Recliner Conversion Kits
Recliner conversion kits provide all necessary components for power operation, including the motor and associated controls. These kits streamline the process, offering a dedicated solution for upgrading existing manual recliners. Successful installation generally demands fundamental mechanical skills and adherence to provided instructions, ensuring a functional and comfortable result.
Motor and Control Installation for Recliners
Motor installation typically involves securely mounting the unit to the recliner mechanism, ensuring proper alignment for smooth operation. Control installation requires careful wiring to the motor and a convenient location. Following kit instructions precisely is crucial for safe and effective functionality of the powered recliner feature.

Safety Precautions
Always disconnect the vehicle battery before starting any electrical work to prevent shorts and shocks. Employ proper wiring techniques for secure connections and reliable operation.
Disconnecting the Vehicle Battery
Before commencing any wiring or electrical component installation, completely disconnect the vehicle’s negative battery terminal. This crucial step prevents accidental short circuits, protecting both the vehicle’s electrical system and yourself from potential shocks. Ensure the terminal is securely isolated to avoid reconnection during the conversion process.
Proper Wiring Techniques
Employ a quality crimping tool for secure and lasting connections, avoiding loose wires that can cause malfunctions. Utilize appropriately sized wiring for the current draw, and insulate all connections thoroughly. Neatly route wires away from moving parts and heat sources, securing them with zip ties or clips.
Increasing Legroom Considerations
Seat track adjustments during the conversion can potentially create additional space. Power seat conversions often result in noticeable legroom gains for drivers and passengers.
Seat Track Adjustments
Electric seat conversion allows for finer control over seat positioning, potentially maximizing legroom. Carefully assess the existing seat tracks and consider if modifications or replacements are needed. Adjustments can optimize forward and backward travel, creating more space for comfortable driving.
Potential Space Gains
Converting to electric seats often unlocks valuable legroom, especially in older vehicles with limited adjustability. The streamlined motors and redesigned tracks can create extra space. Careful kit selection and installation are key to realizing these gains, improving overall driver and passenger comfort.
Heated Seat Retrofit Integration
Combining electric seat upgrades with heated seat retrofits is popular. Careful wiring is crucial for these combined systems, ensuring proper functionality and safety.
Combining Electric Seat and Heated Seat Upgrades
Integrating heated seat elements during an electric seat conversion provides ultimate comfort. Ensure compatibility between the seat kit and heating pad. Proper wiring is essential, potentially requiring additional relays and fusing for both systems to operate safely and efficiently within the vehicle’s electrical framework.
Wiring Considerations for Combined Systems
Combining electric and heated seats demands careful wiring planning. Utilize separate fused circuits for each system – a 30amp fuse for the seat and another for heating. Relays are crucial to manage current draw, protecting the vehicle’s wiring and ensuring reliable operation of both upgrades.
Cost Estimation
Kit prices vary, but expect to spend between $150 and $400. Factor in additional costs for wiring, connectors, and potentially a transformer, increasing the total expense.
Kit Prices
Universal kits generally range from $150 to $300, offering broader compatibility but potentially requiring more customization. Vehicle-specific kits, designed for particular makes and models, can cost between $300 and $400, providing a more streamlined installation. Prices fluctuate based on features like lumbar support and included wiring.
Additional Material Costs
Beyond the kit, budget $30-$60 for wiring connectors, crimp terminals, and zip ties. A multimeter ($20-$50) is crucial for testing. You might need a transformer ($40-$80) depending on your vehicle’s electrical system. Don’t forget potential costs for new mounting hardware or seat upholstery repair.
Legal and Warranty Implications
Modifications may violate vehicle regulations; check local laws. A power seat conversion could void portions of your vehicle’s warranty, particularly related to the electrical system.
Vehicle Modification Regulations
Regulations concerning vehicle modifications vary significantly by location. Some jurisdictions require inspections and approvals for alterations like power seat conversions, ensuring safety standards are met. It’s crucial to research and comply with all applicable local and state laws before undertaking any modifications to avoid potential legal issues or failed inspections.
Impact on Vehicle Warranty
Modifying your vehicle with a power seat conversion may void portions of your factory warranty, particularly those related to the electrical system or seat components. Carefully review your warranty documentation or consult with your dealership to understand potential impacts before proceeding with the upgrade.

Resources and Further Information
Online automotive forums and enthusiast groups dedicated to vehicle modifications are excellent sources of information and support for your conversion. Manufacturer websites for seat kits often provide detailed instructions and compatibility guides. Consider professional installation if unsure.


0 Comments