Perdue Whole Roaster is a convenient, pre-seasoned chicken designed for effortless cooking. It comes in a mess-free cooking bag, ensuring juicy, flavorful results in about 2 hours and 10 minutes.
1.1 Overview of Perdue Whole Roaster
Perdue Whole Roaster is a pre-seasoned, oven-ready chicken designed for convenience. It comes in a cooking bag, ensuring even cooking and minimal cleanup. With no need for additional seasoning, it offers a hassle-free way to prepare a delicious, juicy roast with consistent results every time.
1.2 Importance of Proper Cooking Instructions
Proper cooking instructions ensure the Perdue Whole Roaster is cooked to a safe internal temperature, preventing undercooking or overcooking. Following guidelines guarantees juicy, flavorful meat and avoids foodborne illness risks, making the cooking process both safe and enjoyable for a perfect meal every time.
Key Features of Perdue Oven Ready Whole Roaster
Perdue Oven Ready Whole Roaster is pre-seasoned for flavor and convenience, featuring a mess-free cooking bag that simplifies preparation and cleanup, ensuring a delicious meal effortlessly.
2.1 Pre-seasoned and Oven-Ready Design
The Perdue Whole Roaster is pre-seasoned with savory spices, offering a flavorful meal with minimal effort. Its oven-ready design allows for direct placement in the oven, eliminating the need for additional seasoning or preparation, making it a convenient option for home cooks seeking delicious results without extra work or time.
2.2 Convenience of Cooking Bag
The cooking bag provided with the Perdue Whole Roaster simplifies the cooking process and cleanup. It prevents splatters in the oven, ensuring a mess-free experience. The bag traps moisture, enhancing flavor and tenderness, while also reducing post-cooking effort, making it an ideal feature for a hassle-free roasting experience at home.
Ingredients and Tools Needed
The Perdue Whole Roaster is pre-seasoned and comes in a cooking bag, minimizing the need for additional ingredients. Essential tools include an oven, baking pan, and utensils for handling.
3.1 Ingredients for a Perfect Roast
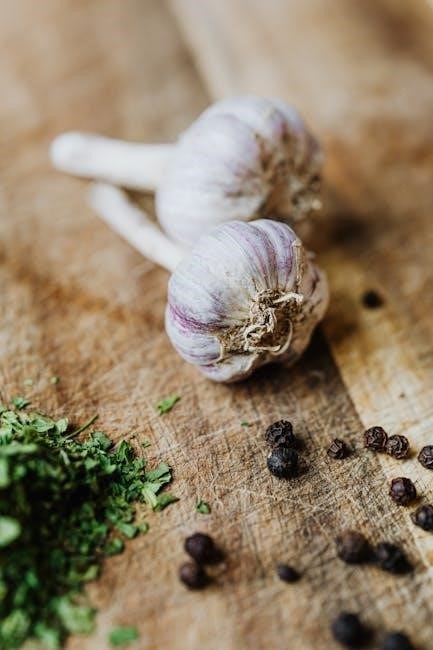
The Perdue Whole Roaster comes pre-seasoned, simplifying preparation. Additional ingredients like olive oil, garlic, or herbs can enhance flavor. Optional vegetables such as carrots, potatoes, and onions complement the dish, roasting alongside the chicken for a complete meal.
3.2 Essential Cooking Tools and Equipment
A roasting pan or baking dish is necessary for oven placement. A meat thermometer ensures proper internal temperature. Tongs or a fork can help position the roaster. A cutting board is handy for carving. Optional tools include a timer for tracking cooking time and oven mitts for safe handling.
Safety Guidelines and Handling Tips
Always handle raw chicken safely to prevent cross-contamination. Wash hands thoroughly before and after handling. Use separate utensils and cutting boards for raw poultry. Ensure the roaster is cooked to an internal temperature of 165°F for food safety.
4.1 Proper Handling of Raw Chicken
Wash hands thoroughly with soap and water before and after handling raw chicken. Use separate cutting boards and utensils to prevent cross-contamination. Ensure all surfaces are sanitized after contact with raw poultry. Always cook the roaster to an internal temperature of 165°F to ensure food safety and avoid undercooking.
4.2 Safe Storage and Thawing Instructions
Always store Perdue Whole Roaster in its original packaging on the refrigerator’s bottom shelf to prevent cross-contamination. To thaw, place in a leak-proof bag in the fridge, allowing 24 hours per 4-5 pounds. Alternatively, thaw in cold water, changing water every 30 minutes. Never thaw at room temperature, as bacteria can multiply rapidly. Cook immediately after thawing for food safety. Do not refreeze once thawed to maintain quality and safety. Ensure the refrigerator temperature stays below 40°F during storage to prevent bacterial growth.
Thawing Instructions for Perdue Whole Roaster
Thaw in refrigerator or cold water. Allow 24 hours per 4-5 pounds. Never refreeze after thawing. Cook immediately for safety and optimal flavor.
5.1 Recommended Thawing Methods
Thaw Perdue Whole Roaster in the refrigerator for 24 hours per 4-5 pounds. For faster thawing, submerge in cold water, changing water every 30 minutes. Never thaw at room temperature to ensure food safety and prevent bacterial growth. Once thawed, cook immediately to maintain quality and flavor.
5.2 Time Required for Thawing
Thawing time in the refrigerator is about 24 hours per 4-5 pounds. In cold water, change water every 30 minutes, requiring 30 minutes per pound. For a 6-pound Perdue Whole Roaster, refrigerate for 36-48 hours or thaw in cold water for 3 hours. Always thaw safely to ensure food quality and prevent bacterial growth.
Preheating and Oven Preparation
Preheat the oven to 400°F. Place the roaster in the cooking bag on the lower shelf. Lower temperature to 350°F after 15 minutes. Easy cleanup.
6.1 Preheating the Oven to the Right Temperature
Preheat the oven to 400°F for optimal cooking. After placing the roaster in the oven, reduce the temperature to 350°F to ensure even cooking and prevent burning.
6.2 Positioning the Roaster in the Oven
Place the Perdue Whole Roaster in a pan or baking dish, still in its cooking bag, and position it on the lower shelf of the oven. This ensures even cooking and prevents the bag from touching the oven walls, promoting consistent heat circulation for a perfectly roasted chicken.
Step-by-Step Cooking Instructions
Preheat oven to 400°F. Place the roaster in the cooking bag on a pan. Cook at 350°F for about 2 hours and 10 minutes. Monitor internal temperature to ensure safety and even cooking. Let rest before carving for juicy, flavorful results.
7.1 Placing the Roaster in the Cooking Bag
Gently remove the giblets from the cavity. Carefully place the Perdue Whole Roaster into the provided cooking bag, ensuring it is centered and evenly positioned. Make sure the bag is sealed tightly around the roaster to trap juices and flavors. Place the bagged roaster in a roasting pan, breast side up, for even cooking and easy cleanup.
7.2 Cooking Time and Temperature Adjustments
Preheat the oven to 400°F. Place the bagged roaster in the oven and roast at 400°F for 15 minutes. Reduce the heat to 350°F and continue cooking for approximately 25 minutes per pound, or about 2 hours and 10 minutes for a 6-pound roaster. If stuffed, add 20-30 minutes to the cooking time. Always check internal temperature reaches 165°F for safety.
7.3 Monitoring the Cooking Process
Monitor the roaster’s progress by checking the internal temperature, which should reach 165°F. Avoid opening the oven excessively to prevent heat loss. Use the cooking bag’s transparency to visually inspect doneness. Ensure even browning and that juices run clear. If stuffed, verify the stuffing’s internal temperature also reaches 165°F for food safety. Adjust cooking time as needed.
Post-Cooking Steps
After cooking, let the roaster rest for 10-15 minutes before carving. Use a sharp knife to slice evenly, ensuring juicy and tender meat for serving.
8.1 Letting the Roaster Rest
After removing the Perdue Whole Roaster from the oven, allow it to rest in the cooking bag for 10-15 minutes. This step ensures juices redistribute evenly, keeping the meat tender and flavorful. Do not skip this crucial step, as it enhances the overall texture and taste of the roasted chicken.
8.2 Carving and Serving Tips
Once rested, carefully remove the chicken from the cooking bag. Use a sharp knife and carving fork to slice evenly. Serve with pan juices spooned over the top for added flavor. Pair with roasted vegetables or mashed potatoes for a complete meal. Ensure all slices are tender and juicy for a delightful dining experience.
Adding Vegetables to the Roaster
Add vegetables like potatoes, carrots, and onions directly to the cooking bag with the Perdue Whole Roaster. This ensures they absorb flavorful juices, creating a complete meal effortlessly.
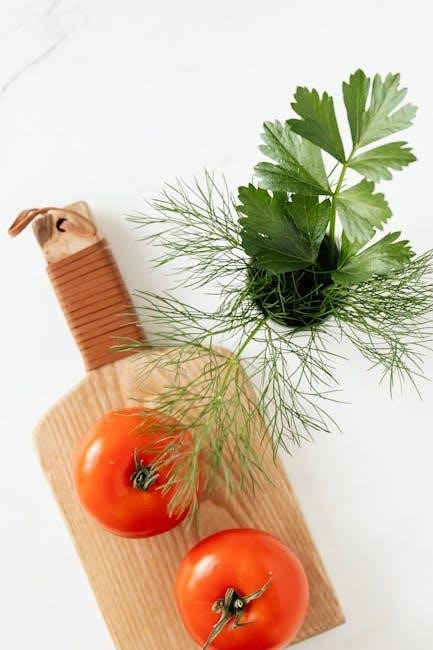
9.1 Choosing the Right Vegetables
Potatoes, carrots, and onions are ideal for roasting alongside the Perdue Whole Roaster. Brussels sprouts, sweet potatoes, and celery also work well. Choose vegetables that hold their shape and caramelize nicely when roasted. Cut them into bite-sized pieces for even cooking and toss with olive oil, salt, and pepper before adding to the cooking bag.
9.2 Timing for Adding Vegetables
Add vegetables like carrots, potatoes, and onions after the initial 15 minutes of roasting. Harder vegetables need about 45-60 minutes, while softer ones like Brussels sprouts require 30-40 minutes. Toss vegetables in olive oil, season, and spread around the roaster. Check for tenderness and caramelization before serving, ensuring they’re cooked through and golden brown.
Nutrition Information
Perdue Whole Roaster offers 210 calories per serving, with 4g saturated fat, 0g dietary fiber, and 1g total sugars, providing a balanced meal option.
10.1 Caloric Content and Macronutrients
Perdue Whole Roaster provides approximately 210 calories per serving, with 4g of saturated fat, 0g of dietary fiber, and 1g of total sugars. It offers a balanced mix of protein and fats, making it a nutritious choice for a hearty meal. The chicken is raised without antibiotics, ensuring a healthier dining experience for the family.
10.2 Health Benefits of the Perdue Whole Roaster
Perdue Whole Roaster is a lean protein source, promoting muscle growth and repair. With no antibiotics ever, it supports better health choices. The all-vegetarian diet and cage-free raising ensure higher quality meat, offering essential nutrients for a balanced diet. This makes it a great option for health-conscious individuals and families seeking wholesome meals.
Tips for First-Time Cooks
For a perfect roast, always follow instructions, use a meat thermometer, and ensure the chicken reaches 165°F internally. Preheat the oven, place the roaster in the bag on the lower shelf, and let it cook undisturbed for the recommended time. This ensures a juicy, flavorful result with minimal effort.
11.1 Common Mistakes to Avoid
Avoid opening the oven too often, as this can disrupt even cooking. Don’t forget to preheat the oven to 400°F before placing the roaster inside. Ensure the chicken is fully thawed and always use the provided cooking bag to prevent drying out. Overlooking the recommended temperature adjustments and cooking times can lead to undercooked or overcooked meat. Always use a meat thermometer to confirm the internal temperature reaches 165°F for safety.
11;2 Ensuring Juicy and Flavorful Meat
To achieve juicy and flavorful results, ensure even cooking by placing the roaster in the center of the oven rack. Avoid overcrowding the oven, as this can disrupt air circulation. The pre-seasoned cooking bag enhances flavor without extra effort. Letting the roaster rest for 10-15 minutes before carving allows juices to redistribute, ensuring tender and moist meat every time.
Cleanup and Storage
Cleanup is effortless with the cooking bag, containing all juices. Store leftovers in airtight containers and refrigerate within two hours of cooking for food safety.
12.1 Easy Cleanup with the Cooking Bag
The cooking bag simplifies cleanup by containing all juices and mess. Once cooked, carefully remove the roaster, then dispose of the bag. This method eliminates scrubbing pans and reduces kitchen waste. For added convenience, let the bag cool slightly before discarding to ensure safety and ease.
12.2 Storing Leftovers Properly
After cooking, cool leftovers to room temperature within two hours. Store in airtight containers and refrigerate at 40°F or below. Consume within 3-4 days or freeze for up to 4 months. Ensure proper wrapping to prevent freezer burn. Never leave cooked chicken at room temperature for extended periods to avoid foodborne illness.


0 Comments