Understanding the 1998 Ford F-150’s electrical system relies on accessing accurate fuse box diagrams. Online resources and owner manuals detail fuse panel locations and assignments for both under-hood and under-dash boxes.
Importance of Understanding Fuse Box Diagrams
Navigating the electrical complexities of your 1998 Ford F-150 becomes significantly easier with a solid grasp of its fuse box diagrams. These diagrams are essential for quickly identifying and resolving electrical issues, preventing unnecessary trips to a mechanic. A blown fuse is often the culprit behind malfunctioning lights, unresponsive accessories, or even starting problems.
Without a diagram, locating the correct fuse can be a frustrating and time-consuming process. Understanding the layout – whether it’s the under-hood or under-dash box – allows for swift diagnosis. Online databases and the original owner’s manual provide detailed schematics, illustrating fuse assignments for everything from the engine and powertrain to interior components like the radio and wipers. Knowing the amperage rating of each fuse is also crucial to avoid using an incorrect replacement, which could lead to further damage or safety hazards. Properly utilizing these diagrams empowers owners to perform basic electrical repairs confidently and efficiently.
Overview of the 1998 F-150 Electrical System
The 1998 Ford F-150’s electrical system is a comprehensive network powering numerous functions, from essential engine controls to convenience features. It relies on a series of interconnected circuits protected by fuses and relays, strategically housed in both an under-hood fuse box and an under-dash (inside cab) fuse box. These fuse boxes act as central distribution points, safeguarding the wiring harness from overloads and short circuits.
The system encompasses components like the ignition system, fuel delivery, lighting, climate control, and the audio system. Diagnostic trouble codes (DTCs) can pinpoint electrical faults, often leading back to a specific fuse or relay. Accessing wiring diagrams, often found in workshop manuals or online databases, is vital for tracing circuits and understanding component interactions. The owner’s manual provides a basic overview, but detailed fuse box diagrams are key to effective troubleshooting and maintenance of this robust, yet complex, electrical architecture.
Fuse Box Locations in the 1998 Ford F-150
The 1998 F-150 features two primary fuse box locations: one under the hood and another conveniently situated under the dashboard, near the brake pedal.
Under-Hood Fuse Box Location
Locating the under-hood fuse box in your 1998 Ford F-150 is a crucial first step for any electrical system troubleshooting. Typically, this fuse box is found within the engine compartment, usually on the driver’s side. It’s often positioned near the battery, making access relatively straightforward. The box itself is a black plastic enclosure, clearly labeled as the fuse box.
Referencing your owner’s manual or online diagrams (like those found at fuse-box.info) will pinpoint the exact location for your specific F-150 configuration. Inside, you’ll find a variety of fuses and relays responsible for powering essential engine and powertrain components. These include systems like the fuel pump, ignition, and various sensors. Familiarizing yourself with this location and the components it protects is vital for quick and efficient repairs. Remember to disconnect the negative battery terminal before working inside the fuse box for safety.
Under-Dash (Inside Cab) Fuse Box Location
The under-dash fuse box, also known as the instrument panel fuse box, in a 1998 Ford F-150 is typically located beneath the dashboard on the driver’s side. Specifically, it’s often found to the left of the steering wheel, behind a small access panel near the brake pedal. This location is designed to protect the fuses from the elements and provide convenient access for interior electrical system maintenance.
Online resources, such as fuse-box.info, and your vehicle’s owner manual will provide a precise diagram illustrating its exact position. This fuse box controls interior components and accessories like lights, the radio, wipers, and power windows. Identifying this fuse box is essential for addressing issues with these systems. Before inspecting or replacing any fuses, ensure the ignition is off. The cover will usually have a fuse layout printed on the inside for easy identification.

Identifying Fuse Types and Ratings
The 1998 Ford F-150 utilizes various fuse types, commonly blade fuses. Understanding amperage ratings—indicated by color-coding—is crucial for correct replacement and electrical protection.
Common Fuse Types Used in the 1998 F-150
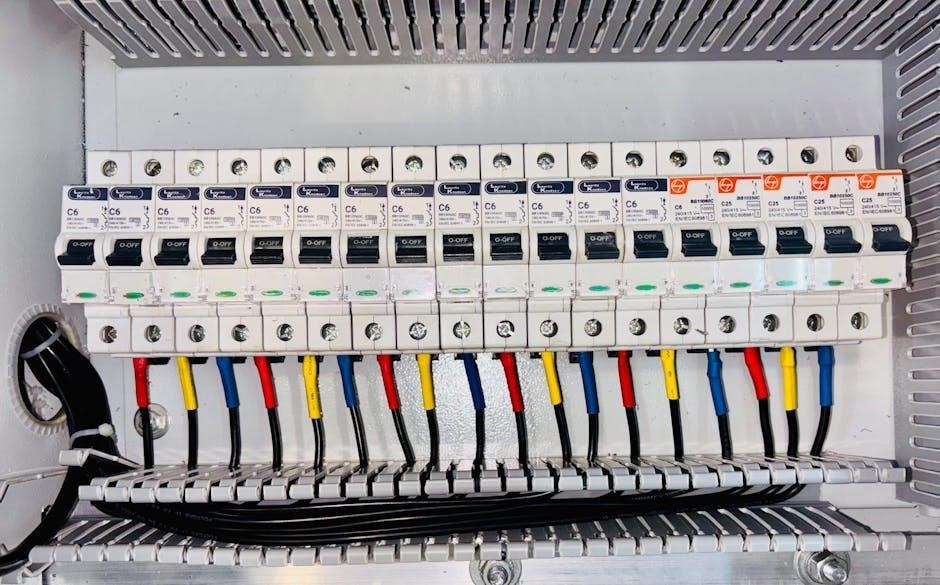
The 1998 Ford F-150 predominantly employs blade-style fuses within its fuse box systems. These fuses are characterized by their rectangular shape with plastic bodies and metal contacts. They are designed for easy identification and replacement, contributing to simplified electrical system maintenance. While other fuse types might be present for specific components, blade fuses represent the vast majority used throughout the vehicle’s electrical circuits.
These blade fuses come in a variety of sizes, though the most common are mini and standard blade fuses. The size refers to the physical dimensions of the fuse body, ensuring compatibility with the fuse box terminals. It’s essential to use the correct size fuse to maintain a secure connection and prevent damage to the electrical system. Always consult the owner’s manual or a reliable fuse box diagram to determine the appropriate fuse type and size for each circuit. Using the wrong fuse can lead to electrical malfunctions or even pose a fire hazard.
Understanding Fuse Ampere Ratings (Amps)
Fuse ampere ratings, measured in Amps, indicate the maximum current a fuse can safely handle before blowing. The 1998 Ford F-150 utilizes fuses with varying Amp ratings – commonly 5A, 10A, 15A, 20A, and 25A – to protect different circuits. Lower Amp fuses safeguard sensitive components, while higher Amp fuses protect circuits demanding more power, like the headlights or power windows.
It’s crucial never to replace a blown fuse with one of a higher Amp rating. This bypasses the safety mechanism and can cause significant damage to wiring and components, potentially leading to a fire. Always use a fuse with the exact same Amp rating as the original. The fuse box diagram, found in the owner’s manual, clearly labels the correct Amp rating for each fuse. If a fuse repeatedly blows, it indicates an underlying electrical issue that requires professional diagnosis and repair, rather than simply increasing the fuse size.

Detailed Under-Hood Fuse Box Diagram (1998 F-150)
The under-hood fuse box protects engine and powertrain systems. Diagrams in the owner’s manual illustrate fuse assignments for components like the fuel pump and ignition.
Fuse Assignments – Engine and Powertrain Systems
The 1998 Ford F-150’s under-hood fuse box safeguards critical engine and powertrain components. Key fuses protect the fuel pump (typically 20-30 amps), ignition system (10-15 amps), and engine control module (ECM) – often a 10 or 15 amp fuse. The owner’s manual details specific amperage ratings for each.
Additional fuses cover the cooling fan relay, various sensors, and the anti-theft system. Diagrams clearly label each fuse position, correlating it to the protected circuit. Relay locations are also indicated within the box. Proper fuse selection is vital; using a higher amperage fuse can cause severe damage. Always consult the manual before replacement. Identifying blown fuses is straightforward – the wire inside will be broken. Replacing them with the correct amp rating ensures optimal performance and prevents potential electrical fires; Remember to disconnect the negative battery terminal before working on the fuse box.

Relay Locations within the Under-Hood Box
The 1998 Ford F-150’s under-hood fuse box also houses several crucial relays. Common relay locations include those for the fuel pump, starter, and cooling fan. The owner’s manual provides a detailed diagram pinpointing each relay’s exact position within the box. Relays, unlike fuses, are electromechanical switches, and their failure can manifest as intermittent or complete circuit failure.
Identifying the correct relay is essential for troubleshooting. Relays are typically labeled with a part number and a brief description of their function. Testing relays requires a multimeter to check for continuity and proper operation. Replacing a faulty relay is usually a straightforward process, involving simply unplugging the old relay and plugging in a new one. Always ensure the replacement relay has the same part number as the original. Disconnecting the negative battery terminal before working with relays is a safety precaution.

Detailed Under-Dash Fuse Box Diagram (1998 F-150)

Located beneath the dashboard, this fuse box protects interior components. Diagrams illustrate fuse assignments for lights, wipers, the radio, and other accessories, aiding quick identification.
Fuse Assignments – Interior Components and Accessories
The under-dash fuse box in a 1998 Ford F-150 safeguards a multitude of interior features. Key assignments include fuses for the dome light, map lights, and the instrument cluster illumination. Power windows and power door locks each have dedicated fuses, crucial for operation. The radio, often a primary concern, is protected by a specific fuse, alongside the rear window defroster.
Furthermore, the fuse box controls the operation of the windshield wipers and washer system, ensuring visibility; Accessory outlets, frequently used for charging devices, also rely on a dedicated fuse. Understanding these assignments is vital for diagnosing and resolving electrical issues within the cabin. Diagrams clearly label each fuse position, simplifying identification and replacement. Always consult a reliable fuse box diagram when addressing interior electrical problems to avoid incorrect fuse substitutions and potential damage.
Identifying Fuses for Lights, Wipers, and Radio
Locating the correct fuses for lights, wipers, and the radio within the 1998 Ford F-150’s under-dash fuse box is straightforward with a diagram. Headlights, taillights, and interior lighting each have dedicated fuses, typically ranging from 10 to 20 amps. The windshield wiper motor and washer pump are protected by separate fuses, often around 15 or 20 amps, ensuring independent operation.
The radio fuse, crucial for entertainment, is usually a 10-amp fuse. Identifying these fuses involves referencing the fuse box lid diagram or a detailed owner’s manual. Remember to note the amperage rating before replacement. A blown fuse will exhibit a broken filament. Replacing it with a fuse of the same amperage is essential to prevent electrical damage and ensure proper functionality of these vital vehicle components. Always disconnect the negative battery terminal before fuse replacement for safety.

Troubleshooting Common Electrical Issues
Utilize the 1998 F-150 fuse box diagram to quickly diagnose electrical faults. Identifying and replacing blown fuses is the first step in resolving many common problems.
Using the Fuse Box Diagram for Diagnostics
When facing electrical issues in your 1998 Ford F-150, the fuse box diagram becomes an invaluable diagnostic tool. Begin by pinpointing the affected circuit – whether it’s lights, the radio, wipers, or engine components. Then, consult the diagram to locate the corresponding fuse within either the under-hood or under-dash fuse box.
Carefully examine the diagram’s legend to understand the symbols and abbreviations used. Note the amperage rating of the fuse protecting the circuit. If the circuit isn’t functioning, visually inspect the fuse. A broken filament indicates a blown fuse. Remember to always replace a blown fuse with one of the exact same amperage rating; using a higher amperage fuse can cause serious damage to the electrical system.
Online databases and the original owner’s manual provide detailed diagrams. Systematic use of these resources will significantly streamline the troubleshooting process, saving time and potentially costly repairs.
Identifying and Replacing Blown Fuses

Locating and replacing blown fuses in your 1998 Ford F-150 is a straightforward process, crucial for restoring electrical function. First, consult the fuse box diagram (found online or in your owner’s manual) to identify the fuse responsible for the malfunctioning component. Once located, visually inspect the fuse – a broken or melted filament clearly indicates a blown fuse.
To remove a fuse, specialized fuse pullers are often included within the fuse box. Gently pull the fuse straight out. When replacing, always use a fuse with the identical amperage rating as the original. Using a higher-rated fuse can lead to severe electrical damage and potentially a fire hazard. Ensure the new fuse is firmly seated in the socket.
If a fuse repeatedly blows, it signals a deeper underlying issue within the circuit that requires professional diagnosis and repair. Don’t simply continue replacing fuses without addressing the root cause.
Resources for 1998 Ford F-150 Fuse Diagrams
Numerous online databases (fuse-box.info) and Ford workshop manuals provide detailed 1998 F-150 fuse diagrams, aiding in electrical system troubleshooting and repair.
Online Fuse Box Diagram Databases
Several websites specialize in compiling automotive fuse box diagrams, offering a convenient alternative to physical owner’s manuals. Fuse-box.info is a frequently cited resource, providing detailed diagrams specifically for the 1997-2004 Ford F-150 range, including the 1998 model year. These databases typically categorize diagrams by year, make, and model, simplifying the search process.
Users can often find diagrams illustrating both the under-hood and under-dash fuse box locations, complete with fuse assignments for various electrical components. These online resources often include information on relay locations as well. While generally reliable, it’s always prudent to cross-reference information with a factory service manual when performing critical repairs. These databases are invaluable for quick reference and can save significant time when diagnosing electrical issues, especially when a physical owner’s manual is unavailable or incomplete. They offer a readily accessible solution for identifying fuse locations and amperages.
Ford Workshop Manuals and Documentation
For the most accurate and comprehensive information regarding the 1998 Ford F-150’s fuse box system, consulting official Ford workshop manuals is highly recommended. These manuals, often available for purchase online or through automotive parts retailers, provide detailed diagrams and explanations of the electrical system. They surpass the scope of a standard owner’s manual, offering in-depth troubleshooting guides and wiring schematics.
Ford documentation will precisely detail fuse locations, amperage ratings, and the circuits each fuse protects. They also include relay layouts and diagnostic procedures. While potentially more expensive than free online resources, the accuracy and completeness of these manuals minimize the risk of misdiagnosis or incorrect repairs. Accessing these resources ensures you’re working with information directly from the vehicle manufacturer, guaranteeing reliability and safety when dealing with the F-150’s electrical components. They are the gold standard for detailed repair information.


0 Comments